

I pressed the mixture into the pan and it crumbled at the edges.
That’s how it always goes with these squares. You think you’ve got the right ratio of peanut butter to cereal, and then the whole thing falls apart when you try to get it even. I scraped the sides back together with a spatula. It’s fine.
This isn’t a recipe you make for the beauty of it.
These peanut rice crispy squares taste exactly like the ones from the school bake sale that someone’s grandma brought. The ones that sat on the white paper napkin, slightly greasy at the bottom, chocolate smudged on the corner. You ate one and didn’t think about it again until you wanted another.
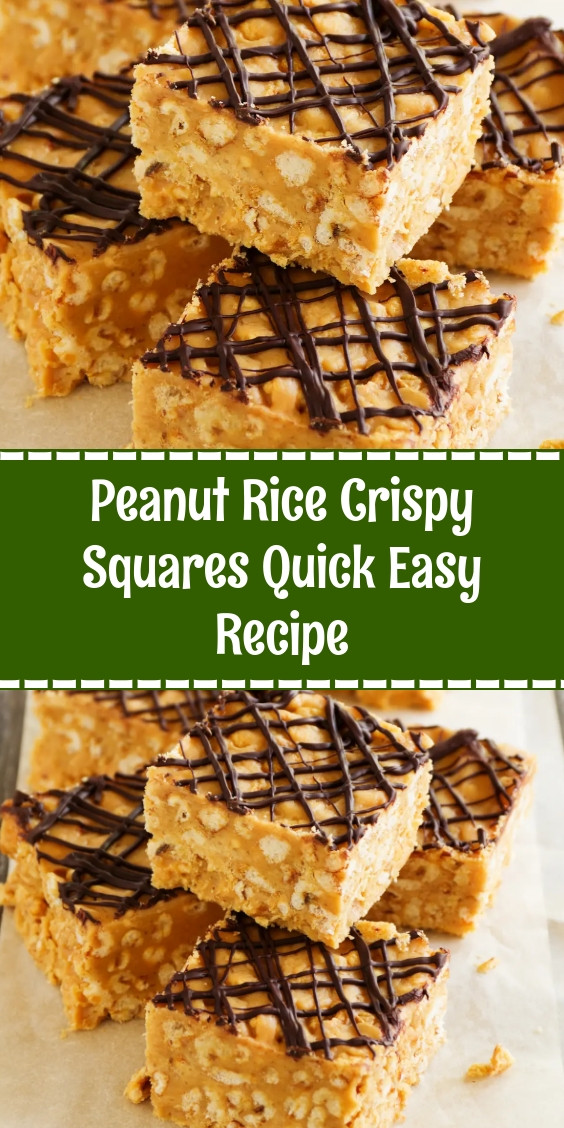
The Chocolate Layer Is the Whole Point
Without the chocolate, this is just a peanut butter-cereal brick. The chocolate layer on top is what makes it feel like a treat instead of a snack you’re forcing yourself to finish.
I used semi-sweet chips because milk chocolate makes it too sweet. The coconut oil in the chocolate keeps it from shattering when you cut it. I’ve made worse.
Honestly? Not that deep.
The first time I made these, my daughter was three. She sat on the counter next to the mixing bowl and watched me stir. She asked why the peanut butter smelled like breakfast. I didn’t have an answer. She pushed her square around the plate later. Wouldn’t eat it.
Now she eats two.
About the butter.
I used salted butter and added the extra salt anyway. That’s a choice. Some people will tell you to use unsalted so you can control the sodium. Those people don’t live in my house. The salt balances the powdered sugar, which is essentially sweet dust. Without it, these squares taste flat.
One thing I notice every time: the mixture looks too dry before you add the cereal.
You melt the butter and peanut butter, stir in the powdered sugar, and it looks like a crumbly paste. Like something went wrong. It hasn’t. That’s how it’s supposed to look. The cereal absorbs the moisture and brings it together. Just keep folding.
Don’t Skip the Parchment Paper
I tried once without it. Wanted to save the ten seconds.
Spent ten minutes scraping chocolate off the pan with a butter knife. The squares came out in jagged pieces. My husband ate them anyway. Said nothing.
The parchment paper gives you two big flaps to lift the whole block out. Then you cut it on a cutting board instead of wrestling it out of the pan. Quick tip: leave enough overhang on two opposite sides so you have handles. Cut your parchment longer than you think you need.
The Hard Part Is Pressing Evenly
Get a second piece of parchment paper. Place it over the mixture in the pan. Then press down with your hands or the bottom of a flat measuring cup.
This keeps your hands clean and distributes the pressure evenly. If you just use your fingers, you’ll have high spots and low spots. The chocolate will pool in the low spots and barely cover the high ones. Then you bite into a square that’s half chocolate, half dry cereal. Nobody wants that.
I learned this the hard way. The fifth or sixth time I made these.
It Looked Done. It Wasn’t.
You need a full hour in the fridge. Minimum.
I pulled a batch after 45 minutes once. The chocolate was firm on the surface but still liquid underneath. The knife dragged through it. Ruined the top of every square. I had to re-melt chocolate and start the top layer over. That batch took three hours start to finish.
If you’re impatient, put the pan in the freezer for 20 minutes. But don’t forget it. I forgot it once. The chocolate cracked.
Do you ever leave things in the freezer too long? I do.
How to Make It
Step 1: Melt 1/2 cup butter and 1 cup peanut butter together. Do this in a saucepan over low heat, stirring constantly. Or use a microwave in 30-second bursts. I use the microwave because I’m not patient enough to stand at the stove. Stir between each burst until it’s smooth and glossy. (Don’t microwave it so long that it separates. If it separates, you went too far. Start over. I’ve done it.)
Step 2: Add 2 cups powdered sugar and 1/4 teaspoon salt. Stir until combined. This will look like a crumbly paste. That’s normal. Keep stirring. It will come together.
Step 3: Fold in 2 cups crispy rice cereal. Use a rubber spatula. Fold gently so you don’t crush the cereal into dust. You want some texture left. When everything is coated evenly, stop. Overmixing turns it into a dense block.
Step 4: Press the mixture into a parchment-lined 8×8 inch pan. Use the parchment flap method I described above. Press firmly. Get the corners. The middle should be level. This matters.
Step 5: Melt 1 1/2 cups semi-sweet chocolate chips with 2 tablespoons coconut oil. Microwave in 30-second bursts or use a double boiler. Stir until smooth. Coconut oil is the trick — it keeps the chocolate from getting too hard to cut cleanly.
Step 6: Pour the melted chocolate over the peanut base. Spread it evenly with a spatula. Get it all the way to the edges. Tilt the pan if you need to. The chocolate should cover the entire surface in a thin, even layer.
Step 7: Refrigerate for at least 1 hour. No shortcuts. The chocolate needs to set completely. If you cut too soon, the chocolate will smear.
Step 8: Cut into squares. Dip your knife in hot water between cuts. Wipe it dry before each slice. This gives you clean edges. Otherwise the chocolate drags and you get ragged squares.
Step 9: Store in an airtight container in the fridge for up to a week. They taste better cold, honestly. The chocolate stays snappy.
What’s your trick for cutting chocolate bars cleanly? Share below!
Ways to Change It Up
Try this: Use crunchy peanut butter instead of smooth. The little chunks of peanut add texture. I do this when I want something with more bite.
Try this: Swap the chocolate for white chocolate or butterscotch chips. White chocolate makes it sweeter, butterscotch adds a caramel note. My daughter prefers butterscotch. I don’t argue.
Try this: Add 1/2 cup mini marshmallows to the cereal mixture. They melt slightly during pressing and leave gooey pockets. Messy but good. Just press gently so you don’t squish them flat.
Which would you go for? Drop it in the comments.
How to Serve It
Serve these straight from the fridge. Cold chocolate snaps when you bite into it. Room temperature chocolate gets soft and messy.
Put them on a plate with a cup of coffee or a glass of milk. That’s it. They don’t need a garnish. They don’t need a drizzle. They’re already doing enough.
If you’re bringing them somewhere, layer them between sheets of wax paper in a container. They’ll stick together otherwise.
What would you pair it with?
Storing It Without Ruining It
These live in the fridge. Always.
Room temperature makes the chocolate bloom — white streaks appear from fat separation. It’s still edible but it looks sad. Refrigerator keeps everything crisp.
Store in an airtight container with wax paper between layers. If you stack them without paper, they fuse together. Peeling them apart ruins the chocolate.
Freezer: wrap individual squares in plastic wrap, then put them in a freezer bag. They keep for 3 months. Thaw in the fridge overnight, not on the counter. Counter thawing makes condensation, which softens the chocolate.
Have you ever saved leftovers like this? Tell me below!
Mistakes I Made So You Don’t Have To
I melted the chocolate too fast. High heat in the microwave. Burnt it in 45 seconds. Smelled like a fireplace. Had to start over. Use 30-second bursts. Stir in between. Low and slow.
I didn’t press the base firmly enough. The squares fell apart when I cut them. Crumbled into cereal dust. Tasted fine but looked like a disaster. Press hard. Commit to it.
I used natural peanut butter once. The kind that’s just peanuts and salt, with oil on top. Stirred it in. The mixture never came together. Too oily, too loose. The squares never set. Use standard peanut butter. Jif or Skippy or whatever brand with added sugar and stabilizers. It works.
Did something like this happen to you?
Quick Questions, Honest Answers
Can I use dark chocolate?
Yes. Use 70% dark. It’s less sweet than semi-sweet. The contrast with the sugary peanut layer is nice. I tried 85% once. Too bitter.
Do I have to use coconut oil?
No. You can skip it. But the chocolate will be harder to cut neatly. Coconut oil keeps it from shattering. I tried butter once. It worked okay but the chocolate was softer.
Can I make these vegan?
Substitute the butter with a vegan butter stick. Earth Balance works. Use dairy-free chocolate chips. The peanut butter and cereal are already vegan. Done.
Can I use a 9×9 pan instead?
Yes. The squares will be thinner. Cut them smaller to compensate. The chocolate layer will spread thinner too. That’s fine.
Why did my chocolate turn white in the fridge?
That’s bloom. The chocolate got too warm at some point or the fridge is too humid. It’s still safe to eat. Tastes fine. Just looks ugly.
Can I double the recipe?
Yes. Use a 9×13 pan. Double everything. Press evenly. Refrigerate an extra 30 minutes because it’s thicker. Cut into 24 squares.
Which answer helped you most?
One Last Thing Before You Go
These squares aren’t complicated.
They’re not the kind of thing you serve at a dinner party and people gasp. They’re the kind of thing you make on a Tuesday afternoon because you have the ingredients and you want something sweet that doesn’t require a mixer or a baking sheet.
They keep in the fridge for a week. You pull one out when you walk past the kitchen. You eat it standing up. You move on.
That’s what most cooking is, isn’t it? Not a performance. Just something that works.
The chocolate on this batch cracked when I cut it. I pressed too hard. The squares are uneven. Some have more chocolate than others.
My daughter ate two after school. Didn’t complain.
Will you make this soon?
Happy cooking! —Danielle Monroe
Fun fact: crispy rice cereal was invented in the early 20th century by a doctor looking for a digestible breakfast for patients. It was originally called “puffed rice.”
Peanut Rice Crispy Squares Quick Easy Recipe
Ingredients
- 2 cups crispy rice cereal
- 1 cup peanut butter
- 1/2 cup butter
- 2 cups powdered sugar
- 1 1/2 cups semi-sweet chocolate chips
- 2 tablespoons coconut oil
- 1/4 teaspoon salt
Instructions
- 1Melt butter and peanut butter together over low heat or in microwave in 30-second intervals, stirring until smooth.
- 2Mix in powdered sugar and salt until well combined.
- 3Gently fold in crispy rice cereal until evenly coated.
- 4Press mixture firmly into a parchment-lined 8×8 inch baking pan.
- 5Melt chocolate chips with coconut oil in microwave or double boiler until smooth.
- 6Spread chocolate layer evenly over peanut rice base.
- 7Refrigerate for at least 1 hour until chocolate is set.
- 8Cut into squares using a sharp knife dipped in hot water.
- 9Store in refrigerator in airtight container for up to 1 week.
Notes
See full recipe for nutritional information.


